

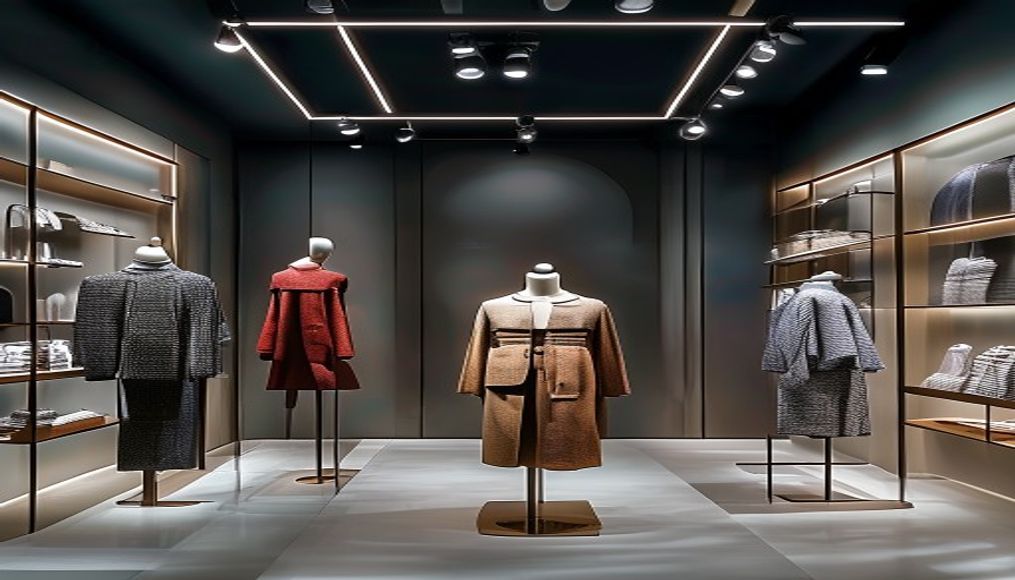
Quick answer: A visual merchandising career combines design, retail logic and execution. The work can include window concepts, product zoning, fixtures, signage, mannequin styling, planograms, seasonal rollouts and performance reviews. Attractive displays matter, but they must also help customers understand the offer and allow stores to operate safely. This guide explains roles, practical skills, portfolio evidence and a pathway into the field.
What a visual merchandising career involves
People searching for visual merchandising career usually need more than a definition or a list of attractive outcomes. They need to understand the work involved, the evidence that proves quality, the trade-offs between options and the checks required before committing time, money or a portfolio claim.
What visual merchandising career includes
Visual merchandising connects brand communication with physical retail execution. The role includes interpreting a commercial brief, planning product placement, building displays safely, coordinating stores and reviewing what happened after installation. It is creative, but it also demands measurement, schedules, stock awareness and communication with operations.
How to evaluate visual merchandising career decisions
Use the guide as a decision sequence rather than a list of ideas. Begin with the purpose of visual merchandising career, compare the available options, test the technical or practical requirements, and document why one choice is more suitable than another. The tables provide a quick orientation; the subsections that follow explain what to inspect, what evidence to retain and which mistakes create avoidable rework.
| Work area | Typical responsibility | Success evidence |
|---|---|---|
| Windows | Concept, styling and installation | Clear story and safe execution |
| In-store journey | Zoning, focal points and navigation | Readable customer path |
| Product presentation | Grouping, density and replenishment | Accessible, maintained display |
| Rollout | Guidelines, plans and store communication | Consistency across locations |
| Review | Observe behaviour and results | Documented improvements |
| Workstream | Typical task | Evidence for a portfolio |
|---|---|---|
| Window or focal display | Concept, elevation, props and installation | Brief-to-installed sequence |
| In-store zoning | Product adjacency, navigation and focal points | Annotated plan and rationale |
| Seasonal rollout | Guideline pack, quantities and store adaptation | Toolkit plus one local adaptation |
| Maintenance | Replenishment, standards and issue correction | Audit sheet and action record |
| Review | Observe customer path and product response | Careful observations without invented sales claims |
How to compare visual merchandising career options
Do not treat the tables as a universal ranking. Compare window or focal display, in-store zoning, seasonal rollout, maintenance against the actual brief, user, place, role or production condition. For each row, write down the evidence available, the assumption being made, the risk if that assumption is wrong and the person who can confirm it. An option becomes stronger when it solves the defined need with fewer unresolved conflicts; it does not become stronger because its label sounds more advanced or visually impressive.
What visual merchandising career evidence to record
Create a small decision record for visual merchandising career before producing the final output. At minimum, make space for commercial and audience brief, measured plan or elevation, product and fixture list, clear focal hierarchy, safe materials and installation method, along with dates, file or sample versions and review comments. Decide what can be verified immediately and what must remain provisional. This record makes feedback specific, prevents an outdated instruction from returning later and helps a student explain not only what was made, but how the result improved through observation, testing and correction.
Translate retail goals into visual decisions
Design for a retail objective
Every display should answer a business and customer question: what is new, what belongs together, what should be noticed first and how can it be found? Begin with the category, audience, campaign, store constraints and stock. A beautiful idea that hides price, blocks access or cannot be replenished is not a strong merchandising solution.
Control hierarchy and sightlines
Use focal points, contrast, repetition, rhythm, scale and negative space to guide attention. Test the view from the entrance, aisle and close range. Product density should suit the positioning and available stock. Signage must be legible without competing with the merchandise. Draw elevations or quick visualisations before installation.
Understand product and customer movement
A merchandiser studies adjacency, category logic, touchpoints and circulation. Place complementary products where the relationship is useful, not merely convenient. Keep paths, doors, services and accessibility clear. Observe where customers pause, become confused or avoid an area, then treat those observations as design feedback.
Plan movement, installation and portfolio evidence
Build practical installation discipline
Execution may involve fixtures, props, hanging, steaming, styling, labels and coordination before opening hours. Plan tools, team roles, timing, safety and removal. Confirm what may be attached or moved. Photograph the completed display from agreed angles and provide a maintenance guide so store teams can preserve the concept.
Use guidelines without losing context
Central teams often create rollout instructions, but each store has different dimensions, entrances and stock. Good guidelines define non-negotiable elements and offer approved adaptations. Store-level teams should document changes rather than improvising silently. Clear communication keeps the story consistent while respecting practical reality.
Create a portfolio with plans and outcomes
Show the brief, customer, floor or window constraint, concept, sketches, product selection, installation and final photographs. Add a reflection on what worked and what changed. Self-directed projects can use measured mock spaces or digital visualisations, but state that they are concepts. Portfolios should demonstrate thinking and execution, not only final styling.
Control hierarchy, product density, safety and measurement
Turn a retail brief into a spatial hierarchy
Identify priority products, audience, campaign message, store type, installation window, available stock, safety limits and materials. Plan what a passer-by should notice first, what supports that focal point and how the customer moves to adjacent products. A colour story is not enough if signs hide merchandise, fixtures block access or the featured stock cannot be replenished. Draw the window or zone before building it and confirm dimensions on site.
Plan product density, adjacencies and navigation
Group products by a logic the customer can understand—use, category, story, colour or coordinated look—while respecting operational needs. Balance impact with browseability. Use plans, elevations, fixture schedules and product lists so the display can be repeated. Check sightlines from the entrance, queue and main aisles. Keep accessible routes, exits, equipment and service points clear, and agree who approves any fixture or electrical change.
Install safely and maintain the standard
Create a sequence for access, tools, ladders, props, graphics, electrical items, waste and final photography. Use materials suited to duration, load and fire or building requirements. Do not improvise overhead suspension or electrical connections without authorised specialists. After launch, a display needs replenishment, cleaning and correction. A practical VM guideline should show a reference view, critical dimensions, acceptable substitutions and a simple audit checklist.
Measure without inventing impact
Possible review signals include availability of featured stock, compliance with the plan, customer path observations, interaction with a zone, product enquiries and sales data supplied by the retailer. Context matters: promotions, stockouts, location and season can affect results. In a student portfolio, state the objective and what you observed, but do not claim a percentage sales lift unless the organisation provided reliable data and permitted its use.
When working on visual merchandising career, decisions that depend on changing safety, workplace, regulatory or professional requirements should be checked against the current project conditions and relevant guidance. Useful verification points include National Qualification Register visual merchandiser role and Retail skill council visual merchandiser handbook. These references support a specific decision; they do not replace measurements, approvals, manufacturer instructions or qualified professional advice.
Prove both creative and operational ability
Create a portfolio case study that proves execution
Show the retail brief, measured condition, target product, customer path, sketches, plan or elevation, material test, installation sequence and final display. Add the product or fixture list and explain one site constraint. If the work is academic, state that clearly and test the proposal at scale where possible. If it is live, secure permission and remove confidential results. Reviewers need to see that the candidate can convert a visual idea into a safe, repeatable installation—not only assemble an attractive collage.
Build skills across creative and operational work
Practise colour and composition alongside measurement, spreadsheet tracking, presentation, basic spatial drawing, prop fabrication, safe tool use and concise instructions. Spend time observing how products are replenished, folded, handled and explained by store staff. Learn to adapt a guideline when dimensions or stock differ without losing the campaign hierarchy. Photograph maintenance problems as well as launch-day perfection. This combination prepares a beginner for assistant and store-level responsibilities and creates a foundation for multi-store planning, retail design or brand experience work.
Worked example: a small seasonal display rollout
visual merchandising career scenario and decision
Start with the campaign message and five priority products. Measure one pilot zone, draw an elevation, define product order, prop quantities, lighting focus and sign position, then create a two-page guideline. During installation, photograph the approved pilot and list non-negotiables such as focal height, product sequence and clear access. For a smaller store, record substitutions rather than forcing the same fixture. The portfolio case study should show brief, plan, material test, installed result and maintenance check.
visual merchandising career evidence to retain
Review the visual merchandising career work against evidence rather than presentation alone. A second reviewer should be able to locate evidence for commercial and audience brief, measured plan or elevation, product and fixture list, clear focal hierarchy; follow the current version; and identify what changed after testing or feedback. Record assumptions that still need confirmation and name the person responsible for resolving each one. This prevents a polished page or render from concealing an incomplete technical, operational or learning decision.
A step-by-step visual merchandising career workflow
Complete the stages in order, but return to an earlier stage whenever new evidence changes the brief. Keep one current version of the decision record so that sketches, drawings, files, samples or approvals do not drift apart.
- Audit a space: Record dimensions, sightlines, circulation, lighting, fixtures, stock and operational limits.
- Set an objective: Define the customer message and the action the display should support.
- Develop options: Sketch hierarchy, product groups, colour and signage before choosing a direction.
- Plan installation: Prepare tools, responsibilities, timing, safety checks and maintenance guidance.
- Review: Photograph, observe customer interaction and record changes for the next cycle.
At every handoff, state what is approved, what remains provisional and what must be checked next. This small discipline makes the workflow easier to review and converts activity into evidence that can be discussed in a portfolio, interview or project meeting.
Review the display proposal before installation
visual merchandising career quality-control checklist
- Commercial and audience brief
- Measured plan or elevation
- Product and fixture list
- Clear focal hierarchy
- Safe materials and installation method
- Store-adaptation rules
- Maintenance owner
- Evidence-based review
visual merchandising career mistakes and their consequences
- Designing a display before understanding stock and customer purpose.
- Blocking circulation or product access with decorative elements.
- Using signage that is too small, crowded or visually disconnected.
- Ignoring maintenance and replenishment after installation.
- Submitting a portfolio of final photographs without plans or reasoning.
visual merchandising career final independent review
Review the visual merchandising career work against evidence rather than presentation alone. A second reviewer should be able to locate evidence for product and fixture list, clear focal hierarchy, safe materials and installation method, store-adaptation rules; follow the current version; and identify what changed after testing or feedback. Record assumptions that still need confirmation and name the person responsible for resolving each one. This prevents a polished page or render from concealing an incomplete technical, operational or learning decision.
Develop retail and fashion skills at IIFT Bangalore
Related skills for visual merchandising career
Apply hierarchy, rhythm, balance and contrast to display work. For the next step, use fashion principles for display composition.
Connect visual judgement with communication and execution. The guide on fashion design skills guide helps you examine that part in depth.
See how retail and presentation roles fit the wider sector. Continue with fashion industry career scope when that becomes the next decision.
Structure merchandising projects as clear case studies. For the next step, use fashion portfolio building.
Compare education paths that can support creative retail work. The guide on fashion course options helps you examine that part in depth.
Decide whether retail-space work fits the intended career path. The related guide helps readers compare visual merchandising with other fresher fashion roles.
Structured learning for visual merchandising career
Readers who want guided studio practice can compare IIFT Bangalore learning options for visual merchandising career. Programme structure and eligibility can change, so ask IIFT Bangalore about current visual merchandising career programme details before making an admission decision.
Questions about visual merchandising career
What is visual merchandising?
It is the planning and presentation of products, spaces, fixtures and communication to help customers understand and navigate a retail offer.
What skills does a visual merchandiser need?
Useful skills include composition, retail understanding, planning, styling, drawing or visualisation, installation, communication and observation.
What should a visual merchandising portfolio show?
Show the brief, space, customer objective, plans, concept options, installation, final views and reflection on results.
Is visual merchandising only about window displays?
No. It also covers product zoning, in-store journeys, fixtures, signage, planograms, seasonal rollouts and maintenance.
What software is useful?
Drawing, image-editing, layout, spreadsheet and basic spatial-modelling tools can help, but employers also value hands-on execution and retail awareness.
Can retail experience help a VM career?
Yes. Understanding customers, replenishment, stock and store operations can strengthen a visual portfolio.
Can a fresher enter visual merchandising?
Yes. A fresher can demonstrate readiness through retail observation, scaled display plans, product grouping, installation logic and a documented before-and-after project rather than relying only on polished mood boards.






Discussion